
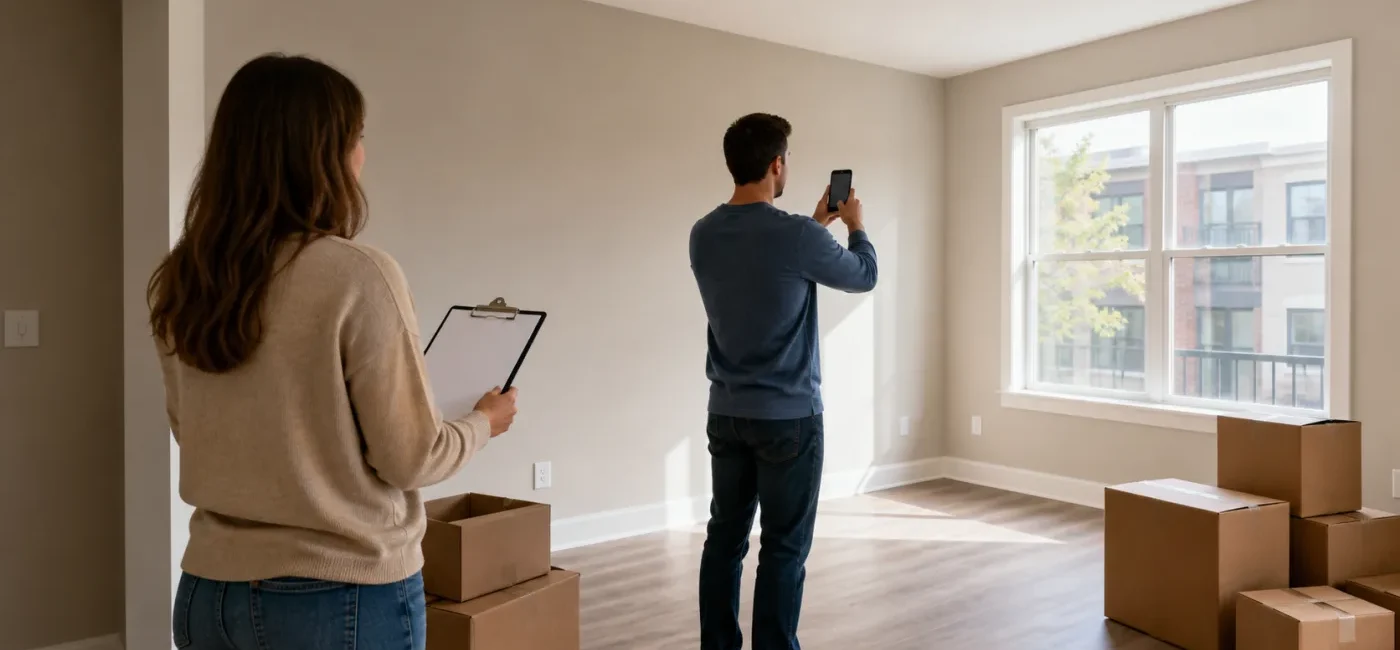
When you receive the keys to a new apartment or rental house, moving in the furniture feels like the obvious first step. But the empty unit gives you one valuable opportunity: a clear record of the walls, floors, windows, plumbing, appliances, and safety devices before your belongings hide them. A careful move-in inspection can help get repairs started quickly and can distinguish pre-existing damage from changes that happen during your tenancy.
Rental rules, security-deposit deadlines, and repair duties vary by state, county, city, and lease. This guide provides a practical documentation and safety-checking process, not a legal opinion about a particular dispute. Review your lease and local requirements. If you find a gas odor, exposed wiring, active ceiling leak, fire hazard, or another immediate danger, do not attempt a repair. Leave the affected area when appropriate and contact property management, the landlord, or emergency services.
The goal is a documented baseline, not a perfect apartment
A move-in inspection has three jobs. First, it records stains, wear, damage, and missing items that existed when you took possession. Second, it identifies safety, sanitation, security, and function problems that need attention before normal use. Third, it gives you and the housing provider a shared baseline in writing. Not every paint mark needs an emergency repair, but every condition that could later be misunderstood should be documented.
- Document only: small floor scratches, old nail holes, cosmetic paint marks, or an appliance dent that does not prevent use.
- Request repair: a window that will not lock, slow sink drain, torn screen, refrigerator that does not cool, or a loose cabinet door.
- Treat as urgent: gas odor, sparking or scorching, active water intrusion, an essential entry lock that does not work, or exposed electrical conductors.
What to gather before the inspection
You do not need professional equipment. Bring a charged phone, charger, flashlight, a small approved outlet tester or phone charger, tape measure, tissues, masking tape, pen, and the move-in condition form. If the landlord or management company supplied a form, use it and attach a numbered photo list when the form does not provide enough space.
- Your final signed lease, addenda, and parking, mail, trash, and pet rules
- Official management contact information and the emergency maintenance number
- A count of keys, access cards, mailbox keys, and garage or gate remotes
- A phone with automatic date and time metadata enabled
- A cloud folder or separate drive for preserving original files
- A simple room map for noting the breaker panel, water shutoff, smoke alarms, and carbon monoxide alarms
If you have not yet signed or paid, verify the address, owner or management company, and payment instructions independently. The FTC warns that scammers may copy a real listing, change the contact information, avoid a legitimate showing, and demand quick payment by wire transfer, gift card, or cryptocurrency. Before sharing sensitive information or paying a deposit, check the management company’s official website and relevant local property records rather than relying only on the contact details in an ad.
Step 1: Record one continuous walkthrough before moving boxes inside
Start at an identifiable location such as the unit entrance, then move slowly through the entry, living room, kitchen, bedrooms, bathrooms, closets, and outdoor space. Hold each wall, floor, ceiling, and window in the frame for a few seconds. The continuous video acts as a map connecting individual photos to the correct room. It does not replace close-up photographs, because small scratches and moisture marks can be hard to see in moving footage.
Narrate the room and location as you record: “living room wall below the north window, four-inch scratch,” for example. Avoid capturing access codes, key numbers, private documents, neighbors’ faces, or vehicle license plates. Keep the original video and photos unedited. If you add arrows or labels for a maintenance request, do so on copies.
Step 2: Use the same photo sequence in every room
Repeat a consistent sequence: four wide corner views, ceiling, walls, floor, doors and windows, outlets and lights, and built-in fixtures. For each defect, take one medium-distance image that shows its location and one close image that shows the condition. Place a tape measure or coin nearby when scale matters, without covering the damage.
Entry and security
- Confirm that the entry door closes fully without binding and that the lock and deadbolt operate normally.
- Test every key and access card and record how many you received.
- Check the intercom, doorbell, entry light, garage door, and gate remote when provided.
- Test window locks and inspect ground-floor screens.
Walls, ceilings, and floors
- Photograph peeling paint, nail holes, tape residue, cracks, and ceiling water marks.
- Record carpet stains, burns, and tears, plus lifted flooring, scratches, or separated seams.
- Do not touch a questionable ceiling stain. Note whether it appears dry or actively wet and ask management to evaluate it.
- Record the location and size of suspected mold-like discoloration and persistent musty odors, then request an evaluation of the source.
Windows and ventilation
Open and close each accessible window and check the latch, glass, screen, and signs of condensation. Run the bathroom exhaust fan and kitchen hood. If the lease and weather conditions allow an HVAC test, confirm that the system starts without forcing an extreme thermostat setting. In hot climates, Smartor’s home AC checklist before extreme heat can help you distinguish filter, drain, and outdoor-unit observations.
Step 3: Run water in the kitchen and bathrooms
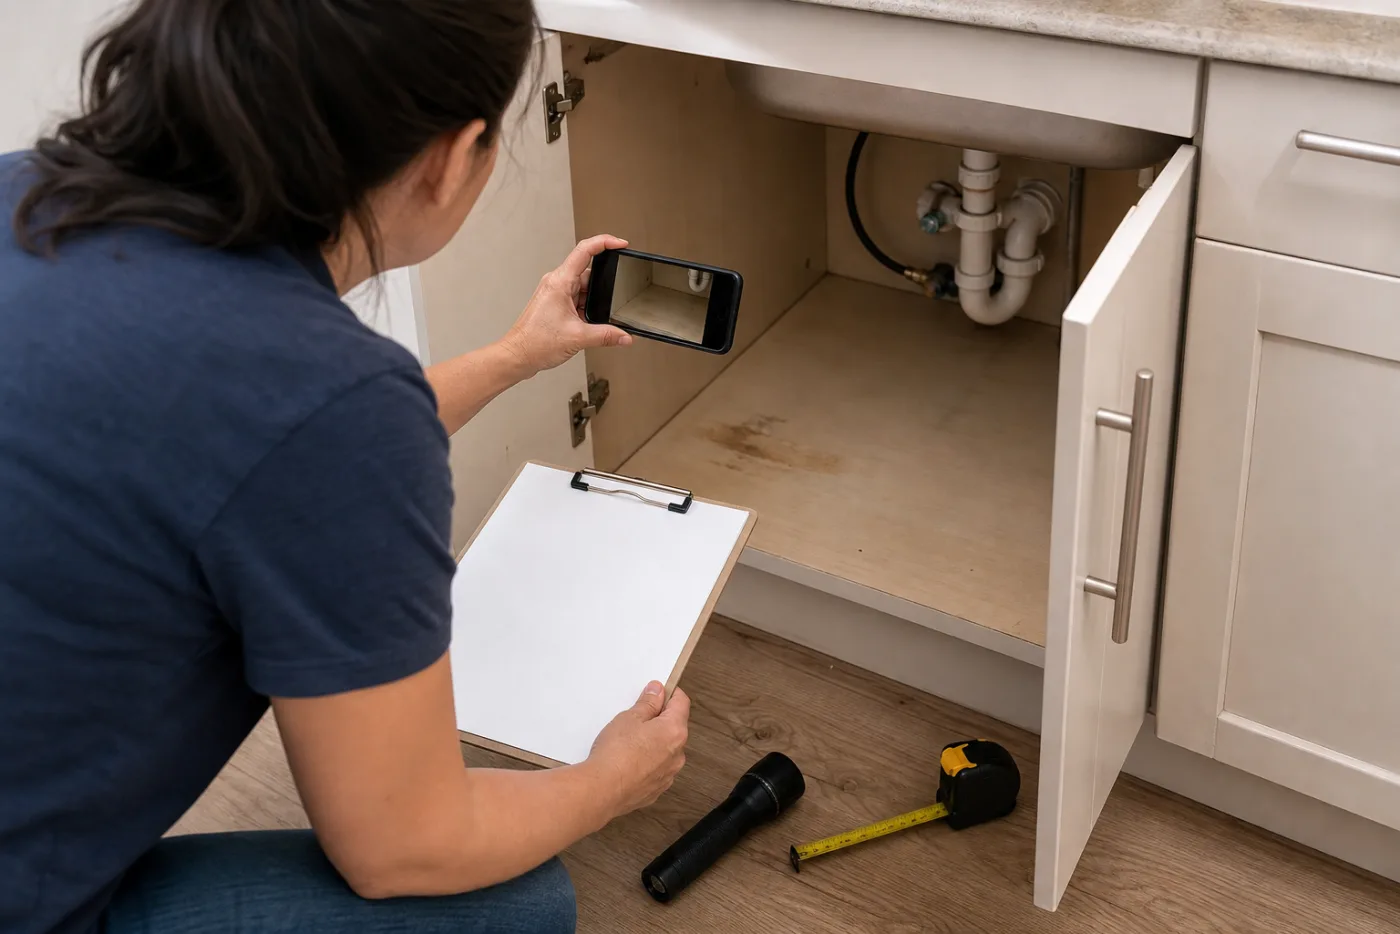
Turn on hot and cold water at each sink and observe pressure, drainage, and the connections below. After shutting the faucet off, a dry tissue under the connections can reveal a small drip. Flush each toilet once and listen for continuous running; note movement at the base or surrounding moisture. Check the tub and shower drain, caulk lines, damaged tile, and exhaust fan. Do not disassemble plumbing or force a stuck shutoff valve.
Basic kitchen appliance checks
- Confirm that the refrigerator and freezer are powered and the door seals close.
- Briefly test the oven, range, microwave, and dishwasher according to instructions and property rules.
- If you smell gas, do not operate a switch or flame. Move outside and follow the property’s emergency instructions.
- Photograph signs of leakage, swollen cabinet material, rust, or older water stains under the sink and dishwasher area.
- Record the type and exterior condition of provided appliances. Avoid posting full serial numbers publicly.
For a separate refrigerator failure or outage, Smartor’s food safety after a power outage guide explains the official time and temperature framework. During move-in, focus on confirming that the empty refrigerator is clean and begins cooling before you store food.
Step 4: Check electrical and alarm function without performing repairs
Turn on each light switch and use a phone charger or approved tester on accessible outlets. Stop using any outlet with a broken cover, loose fit, scorch mark, burning odor, or unusual heat, and report it promptly. Do not remove covers, touch wiring, or open electrical equipment. Locate the breaker panel and confirm that access is clear; ask management about labels that are missing or unclear.
Photograph the location and number of smoke and carbon monoxide alarms. Where the manufacturer’s directions and property rules permit, use the test button to verify a response. Never remove batteries or cover an alarm. If an alarm sounds unexpectedly or you suspect combustion gases, leave the area and follow emergency procedures instead of searching for the source yourself. Local codes determine which alarms are required and where, so ask the housing provider for written confirmation when something appears missing.
Step 5: Review lead-paint disclosures for most pre-1978 housing
The EPA explains that residential lead-based paint was banned in the United States in 1978 but may remain in older homes. For most pre-1978 rental housing, renters must receive information about known lead-based paint and hazards, available records and reports, an educational pamphlet, and warning language before signing a lease. Exceptions exist, so do not assume the rule’s application from the building year alone. Check whether the disclosure materials are included with your lease.
Do not scrape, sand, or vacuum peeling, chipping, chalking, or cracked paint that may create dust. Keep children away from the area, document it, and notify management in writing. If a child or pregnant person will live in the home, review EPA guidance and seek advice from a certified lead professional and a healthcare professional when appropriate. A move-in photo records condition; it is not a lead test.
Step 6: Organize files by room and item
A folder of 100 files named IMG_4832 through IMG_4931 is difficult to use. Preserve the untouched originals, then name copies with a clear pattern such as “2026-08-29_kitchen_under-sink_water-mark_01.” Put the same item number on the written checklist. Keep photo metadata, the original walkthrough, and submission emails or portal confirmations. Store important evidence in at least two locations rather than only on the phone.
Sample condition entry
- Item: cabinet below kitchen sink
- Condition: dry water mark in rear-right corner; no active drop visible at inspection
- Photos: KITCHEN-07 location view and KITCHEN-08 close detail
- Request: inspect for a plumbing leak and reply with the result in writing
- Priority: request scheduling within 48 hours; use emergency contact if active leakage starts
Describe observations rather than diagnosing the cause. “The tissue below the right connection became wet after the faucet ran for one minute” is more useful than “the plumbing is completely broken.” Specific, repeatable details help maintenance staff plan the visit and reduce misunderstandings.
Step 7: Submit everything in writing before the deadline
Check the lease and move-in form for a submission deadline and required method. Use the specified portal, email address, or paper form, and save the upload confirmation or sent message. If you deliver paper, keep a dated copy and request acknowledgment. Include a condition even if a manager says verbally that they already know about it.
A useful repair message states the item, room, discovery time, current safety concern, requested action, and your availability. For example: “During the August 29 move-in inspection at 3 p.m., I observed drops below the right kitchen-sink connection after running water. I have stopped using the sink. Please confirm the inspection time and any temporary precautions in writing.” Follow a phone call with a short written summary of what was agreed.
Three realistic examples
Example 1: A usable carpet with an existing stain
A pale, palm-sized stain is near the living-room window. Take a wide room photo, a medium image showing the window and stain together, and a close detail. Record the approximate size and note that no moisture or odor was observed. Ask whether cleaning is planned. Even if no urgent repair is needed, the record helps prevent the stain from being mistaken for new damage at move-out.
Example 2: A drip below the bathroom sink
A connection drips only while water is running. Stop using the fixture, wipe up standing water, and photograph the wet tissue and connection location. Leave the cabinet empty and submit a maintenance request through the official channel. Tightening a fitting or applying sealant yourself could worsen the problem and make responsibility less clear.
Example 3: Peeling window paint in an older building
Check the construction year and the lead disclosure documents attached to the lease. Do not touch or clean the peeling paint. Keep children away, take location and detail photographs, and notify the housing provider in writing. Ask whether evaluation by an EPA-certified professional is appropriate and consult a healthcare professional about individual health concerns.
Ten common mistakes
- Inspecting after the move. Boxes and furniture hide the original condition.
- Taking only one video. It shows room flow but often misses small defects.
- Taking only close-ups. A second image should establish the room and exact location.
- Reporting verbally only. Summarize calls, dates, and agreements in writing.
- Guessing the cause. Record visible facts and test conditions instead of making a technical diagnosis.
- Disassembling a fixture. Stop use and leave electrical, gas, and plumbing repair to authorized qualified people.
- Missing the lease deadline. Identify the due date and submission channel as soon as you receive the keys.
- Saving only edited images. Keep original files alongside marked-up copies.
- Giving every item the same priority. Separate immediate hazards, repair requests, and documentation-only items.
- Removing alarms or damaged paint. Preserve the condition, keep away from hazards, and report through the proper process.
Move-in day checklist
- □ Confirmed the deadline and method for the move-in condition report.
- □ Counted and tested keys, cards, mailbox keys, and remotes.
- □ Recorded a continuous empty-unit walkthrough and wide photos of every room.
- □ Took both location and detail photos of wall, ceiling, floor, door, and window damage.
- □ Checked locks, lights, accessible outlets, windows, and ventilation.
- □ Ran sinks, toilets, and showers and checked for drainage and leakage.
- □ Performed basic checks of provided appliances and HVAC.
- □ Documented smoke and carbon monoxide alarm locations and test results.
- □ Reviewed lead-paint disclosures when the housing may be covered.
- □ Separated urgent hazards, repair requests, and documentation-only conditions.
- □ Backed up original files in two places and matched photo numbers to the checklist.
- □ Submitted through the official channel on time and saved confirmation.
FAQ
How many photos should I take?
There is no universal number. Take enough to show every room’s overall condition, major fixture, existing defect, and repair issue. A small studio may need dozens; a large house may need more. Quality and context matter more than the count. Each defect should be identifiable by room and location.
What if the landlord did not provide a checklist?
Review the lease and local requirements. You can create a room-by-room list, send it to the official contact, and request acknowledgment. A self-created checklist may not replace a form required by local law. A local housing agency, legal-aid organization, or licensed attorney can explain the rules that apply to your situation.
What if I discover a problem several days after moving in?
Report it in writing as soon as you discover it, even if an initial reporting window has passed. Hidden leaks and intermittent appliance failures may not appear on the first day. Whether the condition affects repair duties or a future deposit decision depends on the lease and local law, so seek local advice when needed.
Do I need a newspaper or another date display in every photo?
Preserving original camera metadata, a continuous walkthrough, and time-stamped email or portal submissions creates a consistent record. No single method is guaranteed to resolve every legal dispute. Keep originals, avoid changing metadata, and maintain several matching records.
Should I test a spot that looks like mold?
Photograph its location and extent and record observations such as odor, moisture, or a nearby leak. Ask the housing provider to evaluate and correct the source. Avoid opening walls, mixing strong cleaning chemicals, or disturbing a large area. If you have symptoms or suspect significant contamination, consult a healthcare professional and a qualified environmental or remediation professional.
Does renters insurance cover pre-existing damage or my security deposit?
Typical renters policies may cover personal property, liability, and certain losses, but they do not automatically resolve pre-existing building damage or deposit disputes. Coverage, deductibles, and exclusions vary. Read the policy and ask the insurer for clarification. For a separate property-claim dispute, Smartor’s home insurance claim denial guide explains how to organize evidence and an appeal.
Final takeaway
A useful move-in inspection is not a contest to find every imperfection. It is a repeatable process: photograph the empty unit by room, check basic water, electrical, lock, appliance, ventilation, and alarm function, separate hazards from ordinary repair and documentation items, and submit the record through the official channel before the deadline. A clear baseline helps maintenance prioritize work and reduces memory-based disagreements when you move out.
This article provides general information for U.S. rental move-ins and is not legal, medical, environmental-testing, or insurance advice. State and local rules and individual leases vary. For a hazard or dispute, seek guidance from the appropriate local housing agency, qualified professional, healthcare professional, or attorney.