Child Car Seat Safety Guide: Installation, Harness and Booster Checklist
Smartor 편집팀
September 10, 2026

Car-seat safety depends less on buying the most expensive model and more on using the right stage for your child, installing it correctly in your vehicle, and buckling the harness correctly on every ride. A setup that worked a few months ago may need adjustment after a growth spurt, a vehicle change, or a thorough cleaning. Treat child-passenger safety as a cycle: choose the seat, install it, buckle the child, inspect it regularly, and respond correctly to recalls or crashes.
The National Highway Traffic Safety Administration (NHTSA) recommends moving from rear-facing to forward-facing, then to a booster and finally to a vehicle seat belt according to both the child’s development and the car-seat manufacturer’s height and weight limits. In general, a child should remain in the current stage as long as the seat allows. State laws vary, and some children have medical or developmental needs that require individual guidance. This article provides general U.S. safety information, not medical, legal, insurance, or product-specific installation advice. Always prioritize the car-seat manual, vehicle owner’s manual, state law, the child’s healthcare professional, and a certified Child Passenger Safety Technician (CPST).
A birthday alone is not a reason to move a child to the next stage. Children of the same age can differ significantly in weight, height, seated shoulder height, and maturity. Read the labels on the seat and compare the child’s current measurements with the manufacturer’s limits.
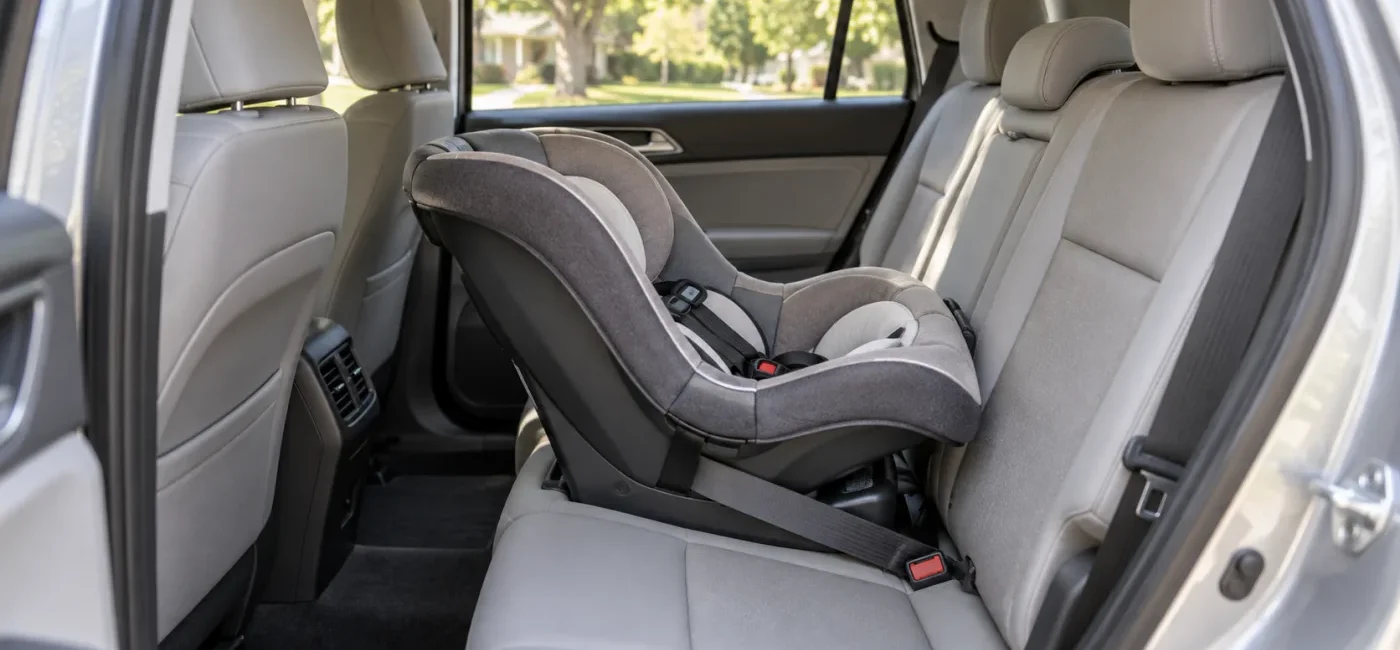
Infants and young toddlers ride rear-facing. NHTSA says children from birth through age 1 should always ride rear-facing and should continue rear-facing until they reach the top height or weight limit allowed by the seat. Legs that touch or bend against the vehicle seatback are not, by themselves, a reason to turn the seat forward. The relevant questions are whether the child remains within the seat’s rear-facing limits, has the required head clearance, and can be buckled correctly.
After a child outgrows the rear-facing limits, use a forward-facing seat with a harness and top tether. Keep the child in the harness until the child reaches the seat’s forward-facing height or weight limit. The top tether is an important connection that reduces forward movement of the upper part of the car seat in a crash. Tether-anchor locations vary by vehicle. Use the diagram in the vehicle manual so that you do not confuse a cargo hook with a designated tether anchor.
When a child outgrows the forward-facing harness but the adult seat belt does not yet fit correctly, use a belt-positioning booster. A booster raises the child so the lap belt lies low across the upper thighs and hips, not the abdomen, while the shoulder belt crosses the middle of the chest and shoulder rather than the neck or face. A booster requires a lap-and-shoulder belt. A seating position with only a lap belt is not appropriate for a belt-positioning booster.
Do not graduate a child from a booster based only on age. Vehicle seat belts often begin to fit sometime between ages 8 and 12, but seat depth and belt geometry differ from one vehicle to another. The child should sit with the back against the vehicle seat, knees bending naturally at the edge, the lap belt low on the hips and upper thighs, and the shoulder belt centered on the chest and shoulder. The child must also be mature enough to stay in that position for the entire trip. NHTSA and CDC recommend that children younger than 13 ride in the back seat.
Choosing a seat from a store display alone can lead to a poor vehicle fit or a model that caregivers struggle to use consistently. Write down the following information before comparing seats:
The highest-priced seat is not automatically the best fit. Seat width, vehicle head restraints, buckle location, seat cushions, and required recline angles can change the result. Review the retailer’s return policy and read the “Child Restraints” section of the vehicle manual before purchasing. If you expect to use the seat on an airplane, separately confirm the approval statement on the product label and the airline’s current rules.
Avoid a used seat with an unknown history. Cosmetic condition cannot reveal every crash, missing component, open recall, or expiration issue. Even when the seat comes from a trusted relative or friend, you should be able to answer every question below.
Follow the manufacturer’s crash-replacement instructions. NHTSA publishes five criteria for a minor crash, but not every manufacturer uses those criteria. Do not assume a seat is reusable simply because airbags did not deploy or the impact happened at low speed. Contact the manufacturer with the model number and crash details. You can also use Smartor’s U.S. vehicle recall guide to check the vehicle’s VIN for open safety recalls.
The car-seat manual identifies belt paths, allowed recline angles, harness positions, insert rules, and cleaning methods. The vehicle manual identifies approved seating positions, lower and tether anchors, seat-belt locking methods, and head-restraint restrictions. Reading only one manual leaves important conditions unanswered.
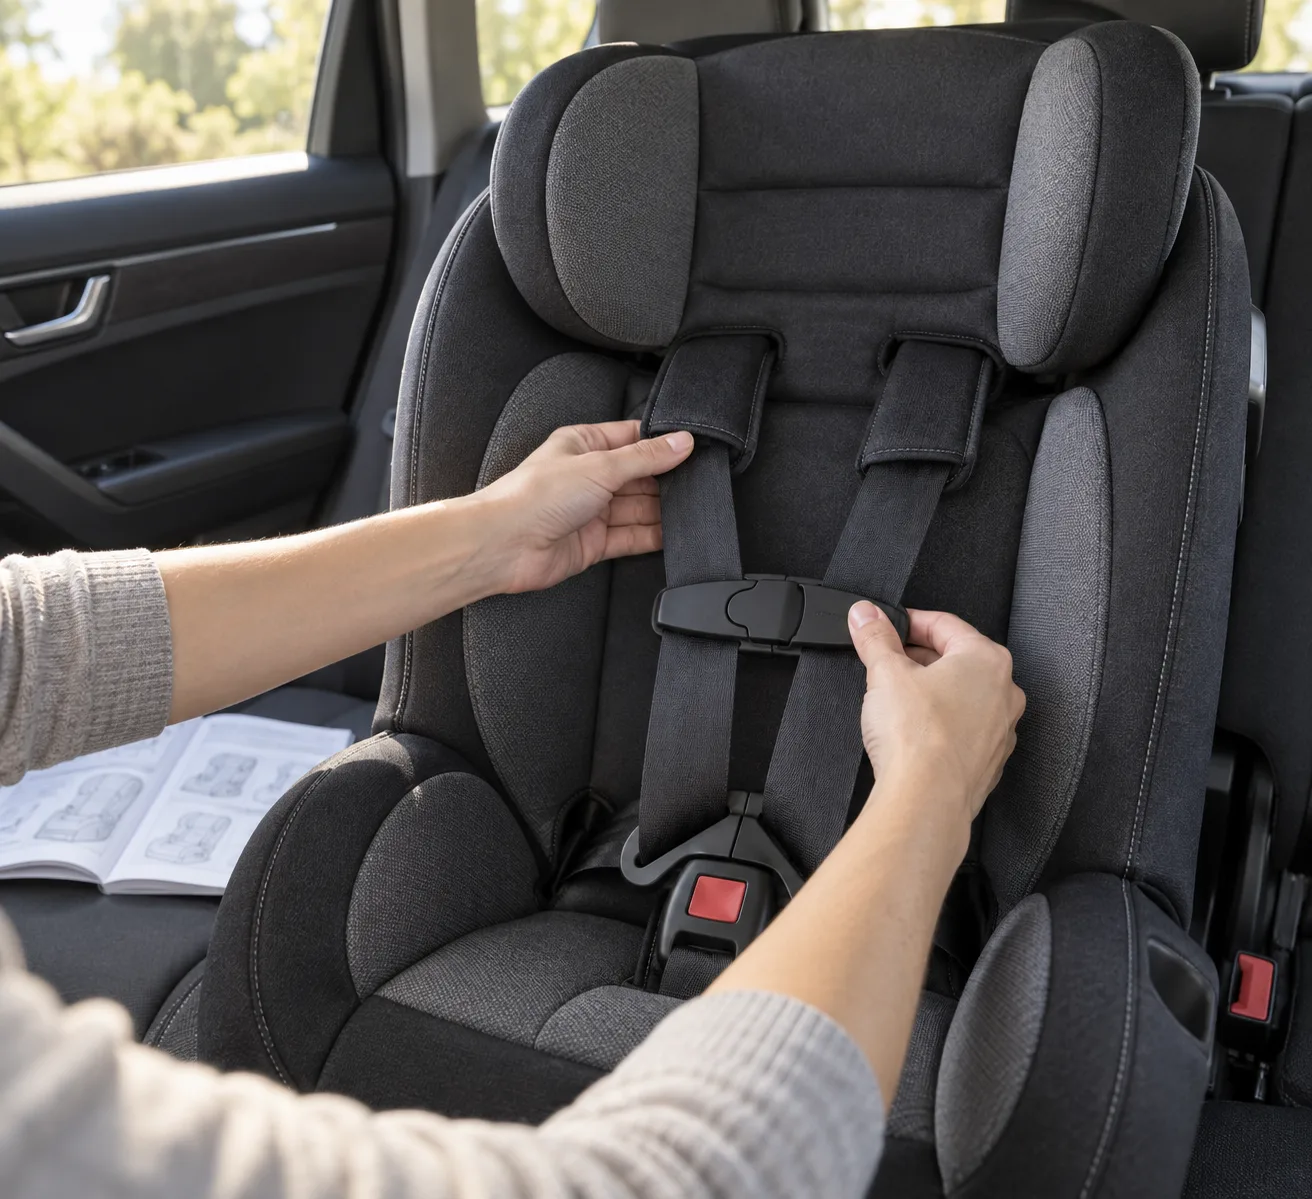
A secure installation cannot compensate for a loose or misrouted harness. Use the same sequence every time:
Do not add a head support, harness cover, clip-positioning device, padding, or other accessory unless the car-seat manufacturer supplies or approves it for that model. An aftermarket product may alter harness fit and may not have been crash-tested with the seat. If a newborn’s head falls forward significantly or a child has breathing, muscle-tone, or positioning concerns, ask the child’s healthcare professional and a technician trained for special transportation needs instead of improvising padding.
The better method is the one that both manuals allow and that you can install correctly. Lower anchors are a standardized convenience, but they are not unlimited. As the combined weight of the child and seat increases, the manufacturer may instruct you to switch to a seat-belt installation. Check the car-seat label and manual for the lower-anchor limit. For a seat-belt installation, use the vehicle manual to learn how that belt locks. If a buckle rests awkwardly at the edge of the belt path or the latchplate rotates into an unstable position, do not invent a fix; ask a CPST.
A top tether can be required for a forward-facing car seat whether the lower anchors or the vehicle seat belt secure the lower part. “No lower anchors” does not mean “no tether.” Rear-facing tether rules vary by model, so never create a connection that is absent from the instructions.
NHTSA’s inspection-station locator can help you find a local fitting station or checkup event. Do not assume every police or fire station can inspect a seat without notice. A certified technician may work only certain hours, and appointments may be required.
A checkup is education, not a permanent “approval sticker.” Recheck the seat after changing vehicles, changing seating positions, taking the seat apart for cleaning, or moving to a new restraint stage.
Mail the product-registration card or register on the manufacturer’s website so the company can send safety-recall notices. The model number and manufacture date are usually printed on labels on the side or bottom of the seat. Update your contact information after moving or receiving a seat from someone else.
Suppose a 2-year-old’s feet touch the vehicle seatback and the child’s legs are bent. First measure current height and weight and compare them with the rear-facing limits on the seat. Check required head clearance and harness position in the manual. If the child remains within the limits, the seat is installed at an approved angle, and the harness fits correctly, bent legs alone do not require turning the seat forward. If the child complains, first check clothing, objects in pockets, twisted straps, temperature, and trip length. When limits are close or positioning remains concerning, contact the manufacturer and a CPST with the exact model information.
Peer pressure can make a child want to leave the booster early. Perform a five-step belt-fit check together. With the child’s back against the seat, do the knees bend naturally at the edge? Does the lap belt stay low on the hips rather than the abdomen? Does the shoulder belt cross the chest and shoulder rather than the neck? Can the child sit that way for a 30-minute ride without leaning forward or putting the belt behind the back? If any answer is no, the child still needs a booster in that vehicle. Repeat the check in a grandparent’s car or rental car because seat geometry changes.
Before traveling, save the car-seat manual PDF on your phone. Once you receive the exact rental model, review the vehicle manual. Bring a small flashlight and allow time to work in a safe parking area. Install the seat, test movement at the belt path against the one-inch guidance, and find the top-tether anchor for a forward-facing setup. Take photos before loading luggage and teach the other driver the harness routine. If the rental company supplies a seat, ask whether you can verify the model, instructions, parts, expiration information, and crash history. Compare that uncertainty with bringing your own known seat.
For a broader vehicle check, use Smartor’s tire recall, pressure, and tread checklist. For bus-stop, walking, and bicycle routines, see the school travel safety guide.
The center may offer distance from a side impact, but only if both manuals allow the installation and you can secure the seat correctly there. Do not “borrow” inner lower anchors from the two outboard positions unless the vehicle and car-seat manufacturers permit it. Use an approved seat-belt installation or another rear seating position when necessary. The practical best position is an allowed back-seat location where the seat can be installed and used correctly every time.
Feet touching the vehicle seatback do not determine the transition. Check the rear-facing height and weight limits, required head clearance, and harness rules for the exact model. Continue rear-facing while the child fits within those requirements.
Both can be appropriate when installed correctly and permitted by both manuals. The key issues are the lower-anchor weight limit, correct belt path, locking method, and tight installation. Do not use both at once unless the manufacturer explicitly allows it.
There is no single period for every product. Read the model’s labels and manual for its manufacture date and usable-life instructions. If a label is unreadable, contact the manufacturer with all available model information rather than guessing.
Follow the manufacturer’s instructions. Some require replacement after any crash; others refer to NHTSA’s minor-crash criteria. Visible condition alone is not enough. Provide the model number, manufacture date, and crash details to the manufacturer, and confirm insurance terms separately. This is not insurance or legal advice.
Cleaning rules differ by component and model. Remove and wash parts only as the manual allows. Do not apply bleach, harsh detergent, machine washing, soaking, or high heat to harness webbing unless specifically permitted. Compare your reassembly with the manual before using the seat again.
Policies vary, but bringing the child often helps the technician check harness height and real-world fit. Ask the inspection site what it requires and bring the vehicle, seat, manuals, and another caregiver if helpful. For a child with special transportation needs, request a technician or medical team with relevant training.
This article provides general educational information about child-passenger safety in the United States. Requirements vary by car-seat model, vehicle, child, health needs, and state law. Follow both manuals and seek help from the manufacturer or a certified CPST when an installation is uncertain.
브라우저 메뉴에서 앱 설치 또는 홈 화면에 추가를 선택해 주세요.