
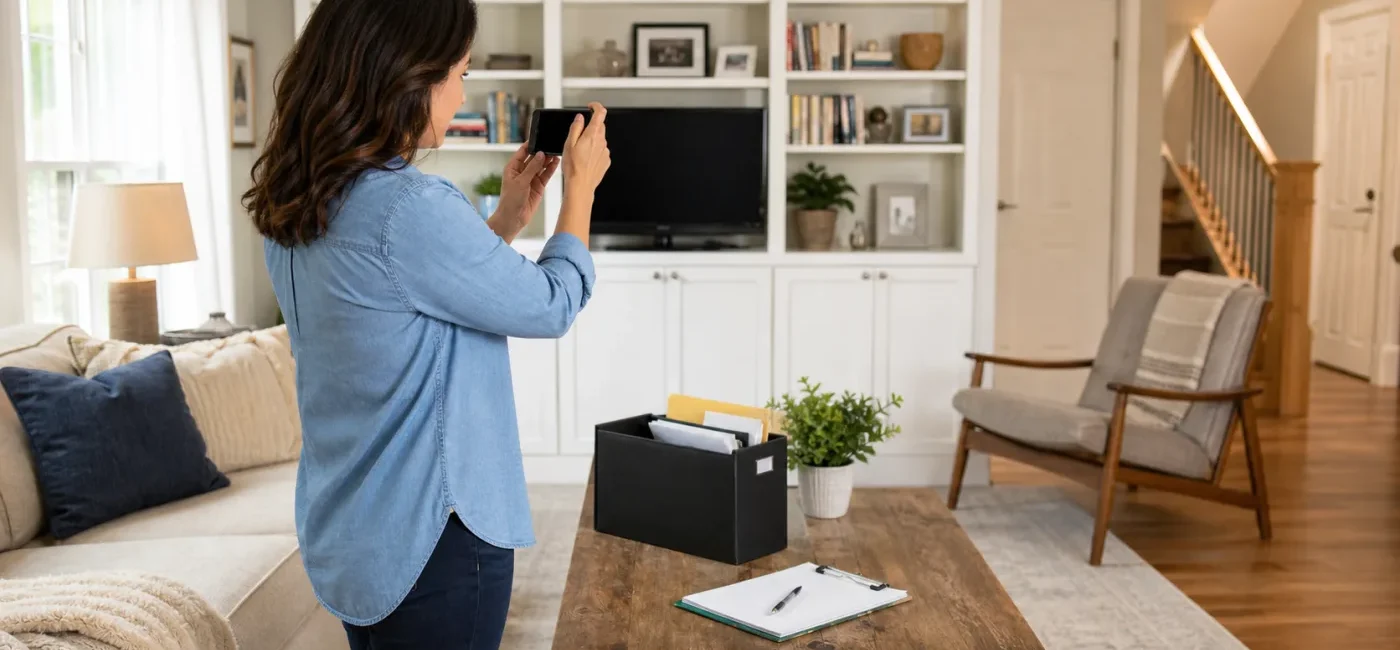
After a fire, flood, windstorm, or burglary, rebuilding a list of everything that was inside your home is harder than it sounds. Small electronics in drawers, seasonal gear, kitchen tools, hobby equipment, and ordinary clothing are easy to forget when you are also dealing with safety, temporary housing, repairs, and family needs. A home inventory gives you a record made before the loss: room-by-room photos or video, identifying details for important items, and available purchase records.
A useful inventory is not simply a list of expensive possessions. It does not increase your coverage or guarantee that a claim will be paid. It can, however, help you describe what you owned, reduce omissions, and ask better questions about whether your current policy fits your household. FEMA’s Ready.gov recommends gathering insurance, financial, and household records before a disaster and keeping important documents in an accessible off-site or cloud location. The National Association of Insurance Commissioners, or NAIC, explains that an accurate home inventory gives an insurer information it may need when settling a claim.
Four problems a home inventory can solve
First, it fills gaps in memory. Immediately after a loss, you may be arranging a safe place to stay, contacting relatives, documenting damage, and coordinating repairs. A pre-loss video of each room gives you a much better starting point than an empty form and a stressed memory.
Second, an inventory makes items easier to identify. “One laptop” is less specific than a record with the manufacturer, model, screen size, approximate purchase date, and serial number. If the receipt is gone, other lawful records—photos, order emails, a relevant card statement, warranty information, a manual, or product registration—may still help. No single record is guaranteed to be sufficient; evidence requirements depend on the claim and the insurer’s review.
Third, the process supports a policy review. Once you see the approximate scale of your belongings and the types of higher-value property you own, you can ask informed questions about personal-property limits and possible sublimits or exclusions for jewelry, art, collections, business equipment, instruments, or other categories. Making a list does not create coverage, so the policy must be reviewed separately.
Fourth, the same record is useful in ordinary life. It can help during a move, when locating a model number for warranty service, or when trying to avoid duplicate purchases. Renters benefit too. A landlord may own the building and some appliances, but the tenant still needs a record of personal furniture, clothing, electronics, and other belongings.
Before you begin: choose a simple system you can maintain
There is no single required tool. You can use a dedicated inventory app, spreadsheet, notes app, or paper worksheet. The best system is one you can start today and update later. Do not let a search for every original price prevent you from finishing the most valuable first steps: a room-by-room video and detailed records for identifiable or higher-value property.
Basic supplies
- A charged phone or camera with enough storage
- A room-by-room checklist or simple spreadsheet
- A flashlight and small mirror for labels behind appliances
- A soft cloth to make a dusty model label readable without damaging it
- Receipts, order emails, warranties, and product-registration records you already have
- A second protected storage location, such as encrypted cloud storage or an encrypted external drive
Security is part of the project. Interior photos can reveal your address, alarm equipment, keys, prescriptions, family records, and the location of valuable items. Do not use a public social-media album or an unrestricted sharing link. Use private storage with a strong, unique password and multifactor authentication. Smartor’s lost or stolen phone response checklist can help you review device locks and recovery settings before keeping the only working copy on your phone.
Step 1: record every room in one continuous pass
On your first pass, capture the layout and contents without stopping to enter every item. Start at the entrance and follow a predictable direction—clockwise works well—through the living room, kitchen, bedrooms, bathrooms, closets, garage, basement, attic, balcony, and storage areas. Begin each room with a wide view, then move slowly along the walls. Open drawers, cabinets, closets, and pantry doors so the contents are visible.
Narrating the video can save time later. A short description such as “55-inch television purchased in spring 2024; game console and camera in the cabinet on the left” gives context that a silent clip may not. Do not read account numbers, Social Security numbers, passwords, alarm codes, or other sensitive data aloud.
Room-video checklist
- Capture a wide shot from the entrance of every room.
- Show all four walls, floors, and movable furniture.
- Open closets, drawers, cabinets, and pantry shelves.
- Include tools, sports equipment, and seasonal gear in the garage.
- Do not miss an attic, basement, shed, balcony box, or rented storage unit.
- In a rental, distinguish your belongings from property supplied by the landlord.
With two people, one person can film while the other marks completed areas and opens and closes storage spaces. If children or pets are present, finish and secure one area at a time rather than leaving tools, cords, medication, or cabinets exposed.
Step 2: make detailed records for valuable or identifiable items
On the second pass, collect information that distinguishes one item from another. You do not need an individual photo of every spoon or sock. Separate records are most useful for electronics, major appliances, furniture, tools, musical instruments, cameras, bicycles, jewelry, collections, and business equipment.
Record as many of these fields as reasonably available:
- Generic item name and manufacturer or brand
- Model name or model number
- Serial number, product identifier, or engraving
- Approximate purchase date and retailer
- Purchase price or the location of available supporting evidence
- Quantity, color, dimensions, material, and other distinguishing features
- The file location of a receipt, warranty, appraisal, or order confirmation
- The room or numbered moving box where the item is normally stored
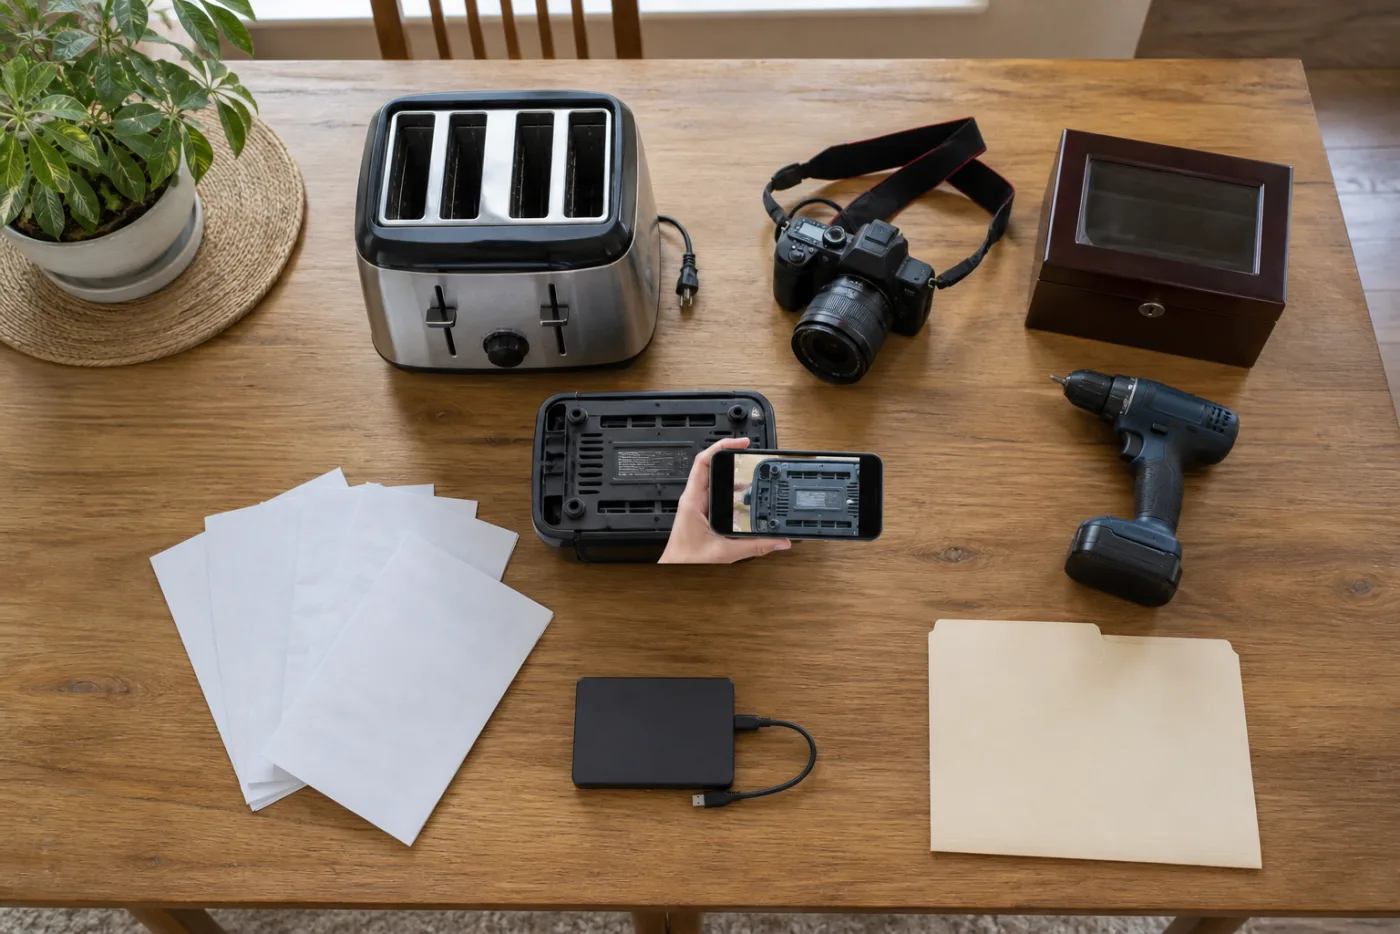
Connect the serial-number photo to the full-item photo. A consistent identifier such as LR-TV-01-front, LR-TV-01-serial, and LR-TV-01-receipt prevents a label from becoming separated from the correct item. Do not move a heavy appliance alone or disassemble a powered device to reach a serial number. A manual, purchase history, or manufacturer account may provide the same information more safely.
Step 3: build a supporting-evidence bundle even without receipts
Many older possessions no longer have an original receipt. That is not a reason to postpone the inventory. Gather what you lawfully have: room video, full-item photos, model and serial labels, order emails, a card statement showing the relevant purchase, warranty service records, product registration, or documentation from the person who gave you an item. If you save a financial statement, protect unrelated transactions, account numbers, and personal details from unnecessary sharing.
For a used item received from a family member, record the date received, condition, manufacturer, model, and approximate age instead of declaring an unsupported “new” price. Whether a claim uses actual cash value, replacement cost, or depreciation depends on the policy and circumstances. The highest online asking price is not automatically the value of your item or the amount an insurer will pay.
Step 4: combine category groups with individual records
An inventory becomes unmanageable if every small household object requires a separate row. Match the level of detail to the item’s value and need for identification.
- Individual record: A laptop, television, camera, bicycle, instrument, or high-quality power tool with a model or serial number
- Small group: Four winter coats, one cookware set, or three bedding sets when a count and quality description are useful
- Room video: Books, dishes, toys, and ordinary clothing that can be documented efficiently as part of a larger area
In a kitchen, for example, you might record the refrigerator and dishwasher individually, photograph each countertop appliance, and document dishes and glassware with shelf photos and approximate counts. In a closet, a narrated video can show ordinary clothing by season, while a formal suit, traditional garment, or expensive coat receives its own record.
Step 5: compare the inventory with your policy
Once the basic inventory is complete, review the declarations page and the sections of your policy addressing personal property. Prepare to ask your insurer or licensed professional these questions:
- What is the personal-property limit, and which causes of loss are included or excluded?
- Does the policy settle personal-property losses using actual cash value or replacement cost?
- If additional payment requires buying a replacement, what is the process and is there a deadline?
- Are there separate limits for jewelry, cash, artwork, collections, instruments, firearms, or business equipment?
- How are belongings away from home, in a vehicle, while traveling, or in self-storage treated?
- Which risks—such as flood, earthquake, sewer backup, or mold—may not be covered by the base policy?
- Besides photos and video, what ownership or value documentation may be requested?
- How does the deductible apply to a covered loss?
Do not assume a standard homeowners policy automatically covers flooding. Ready.gov specifically notes that homeowners insurance typically does not cover flood damage and advises consumers to consider whether separate flood insurance is needed. If you store property below grade, Smartor’s basement flood prevention checklist covers sump pumps, drainage, and policy questions to review before heavy rain.
Step 6: keep one working copy and two recovery copies
If the only inventory is on a laptop or drive inside the home, the record may be destroyed by the same fire or water that damages the property. A practical system separates the working file from recovery copies.
- Working copy: The encrypted computer or private cloud folder you update regularly
- Off-site online copy: A trusted cloud account protected by multifactor authentication
- Offline copy: An encrypted external drive stored in a secure location away from the home
Review sharing permissions and expired links, and decide which trusted household member can obtain the record during an emergency. Do not store the password inside the inventory itself. Use a reliable password-management method or documented emergency-access process. For organizing medical, insurance, and identity records that may be needed during an evacuation, see Smartor’s emergency medication and medical information kit guide and Ready.gov’s Emergency Financial First Aid Kit.
Example: inventory a two-bedroom rental in 90 minutes
Consider two adults in a two-bedroom rental. For the first 20 minutes, one person records a continuous video from the entrance through the living room, kitchen, bedrooms, bathrooms, and closets. The other person checks off each space and opens and closes storage areas as they go.
For the next 40 minutes, they select 20 to 30 easily identifiable items: laptops, monitors, the television, game console, camera, bicycles, and countertop appliances. They take a full photo and model-label photo for each and assign a room code and item number. The spreadsheet records the item name, model, purchase year, and location of supporting documents.
During the final 20 minutes, they search email for major receipts and save each under the matching item ID. They use the last 10 minutes to upload the encrypted folder and test that a file opens on another device. They do not try to price every shirt and kitchen utensil on day one. The following weekend they add closet and hobby details, then maintain the inventory with a 15-minute quarterly review.
How to use the inventory after a loss
Never re-enter an unsafe building simply to retrieve a record or take photos. Follow instructions from the fire department, police, building officials, and other authorities. Take reasonable steps to prevent additional damage only when it is safe and consistent with your insurer’s instructions. Document the scene before moving or repairing property when possible, but do not approach unstable structures, standing water, smoke, or exposed wiring.
- Protect people and pets and contact the appropriate emergency service.
- Notify the insurer through the official claims number, website, or app.
- Record the claim number, representative’s name, date, and next steps.
- Match post-loss photos to the item IDs in the pre-loss inventory.
- Keep receipts for temporary repairs and additional living expenses in a separate folder.
- Before discarding damaged property, ask the insurer and follow any applicable public-safety instructions.
Scammers may impersonate insurers, contractors, or government agencies after a disaster. Use the phone number on your policy, the insurer’s official website, or your state insurance department—not an unsolicited text link or search advertisement. Be cautious when someone pressures you to sign a repair agreement, assign claim rights, pay an upfront fee, or make a decision you do not understand. Verify required licenses and check the agreement before signing.
Ten common mistakes
1. Recording only expensive items. Ordinary clothing, cookware, books, and bedding can be numerous. A narrated room video is an efficient supporting record.
2. Keeping the only copy at home. The belongings and the evidence can be lost in the same event.
3. Taking label photos without context. Link every model or serial label to a full-item photo under the same ID.
4. Inflating purchase prices from memory. Mark an uncertain figure as an estimate and preserve records you can verify.
5. Sharing the inventory with an open link. Interior images and storage locations can create privacy and security risks.
6. Ignoring the policy. The inventory does not change coverage, category limits, exclusions, or deductibles.
7. Moving appliances unsafely. A serial number is not worth an injury or damaged appliance.
8. Failing to add new purchases. Update after a move, renovation, wedding, new baby, major gift, or expensive purchase.
9. Keeping paper receipts in one box only. Paper is vulnerable to fire and water. Create protected digital copies while minimizing exposed personal information.
10. Prioritizing photos over safety after a loss. Wait for permission to enter and follow site-safety instructions.
A realistic maintenance schedule
Update the inventory when you buy or receive an expensive electronic device, appliance, piece of furniture, jewelry item, or instrument; before and after a move; when the policy renews; after a major renovation or home-office change; and during an annual household emergency-preparedness review.
Date each version. Instead of immediately overwriting every older file, keep prior versions for an appropriate period. Mark a sold or discarded item as no longer owned so differences between old videos and the current list are understandable. Test the backup too. Seeing a filename is not enough; open a sample photo, spreadsheet, and document on another device.
Printable final checklist
Do today
- Record every room and storage space in a continuous video.
- Take full photos of appliances, electronics, bicycles, instruments, and valuables.
- Safely record available model and serial numbers.
- Connect major receipts, order records, and warranties to item IDs.
- Distinguish tenant-owned property from landlord-supplied property.
Do this week
- Review the personal-property limit and category restrictions.
- Ask whether actual cash value or replacement cost applies.
- Review risks that may require separate coverage, including flood or earthquake.
- Create a protected off-site copy and an offline copy.
- Choose an update owner and a safe emergency-access method.
After a loss
- Put emergency and site-safety instructions first.
- Start the claim through the insurer’s official channel.
- Match before-and-after photos under the same inventory IDs.
- Keep receipts for temporary repairs and additional expenses.
- Ask before discarding, repairing, or signing a claim-related agreement.
Frequently asked questions
Is an inventory useless if I have no receipts?
No. Room video, item photos, model and serial numbers, order emails, and warranty records may help describe what you owned. The evidence required in a particular claim varies by policy and insurer. Begin with objective information you can document now.
Should I make an inventory if I do not have renters insurance?
Yes. The record may help with a police report, move, warranty claim, or decision about future coverage. The inventory itself does not create reimbursement, however, so separately review whether you have or need coverage.
Do I need to research today’s price for every item?
Not at the beginning. Finish the room video and identifying details for important property first. Use verifiable receipts and order records when available, and label estimates as estimates. The policy controls how a covered loss is valued.
Is it safe to keep interior photos in the cloud?
No storage method is risk-free. Use a reputable service, strong unique password, multifactor authentication, and restricted sharing permissions. Keep identity and account information out of the photos. An encrypted offline copy reduces dependence on a single provider.
Are photos enough for jewelry or fine art?
Do not assume they are. Ask whether the policy has a special limit, requires an appraisal or scheduled listing, or offers an endorsement for the item. Also ask how current an appraisal must be.
How often should I update the inventory?
An annual review is a practical minimum, with immediate updates after a move, renovation, policy renewal, or major purchase. Saving the receipt and photos when an item enters the home makes the annual review much easier.
Bottom line: start with the room video today
The goal is not a perfect asset appraisal. It is a reliable record that helps you reconstruct the facts after a disaster or theft. Spend 20 minutes on a room-by-room video today, connect identifiable items with supporting records this week, and keep a protected copy outside the home. When the inventory and policy are reviewed together, the file becomes a practical recovery tool rather than just a photo collection.