National Park Wildlife Viewing Safety: Distance, Bears, and Food Storage
Smartor 편집팀
September 21, 2026

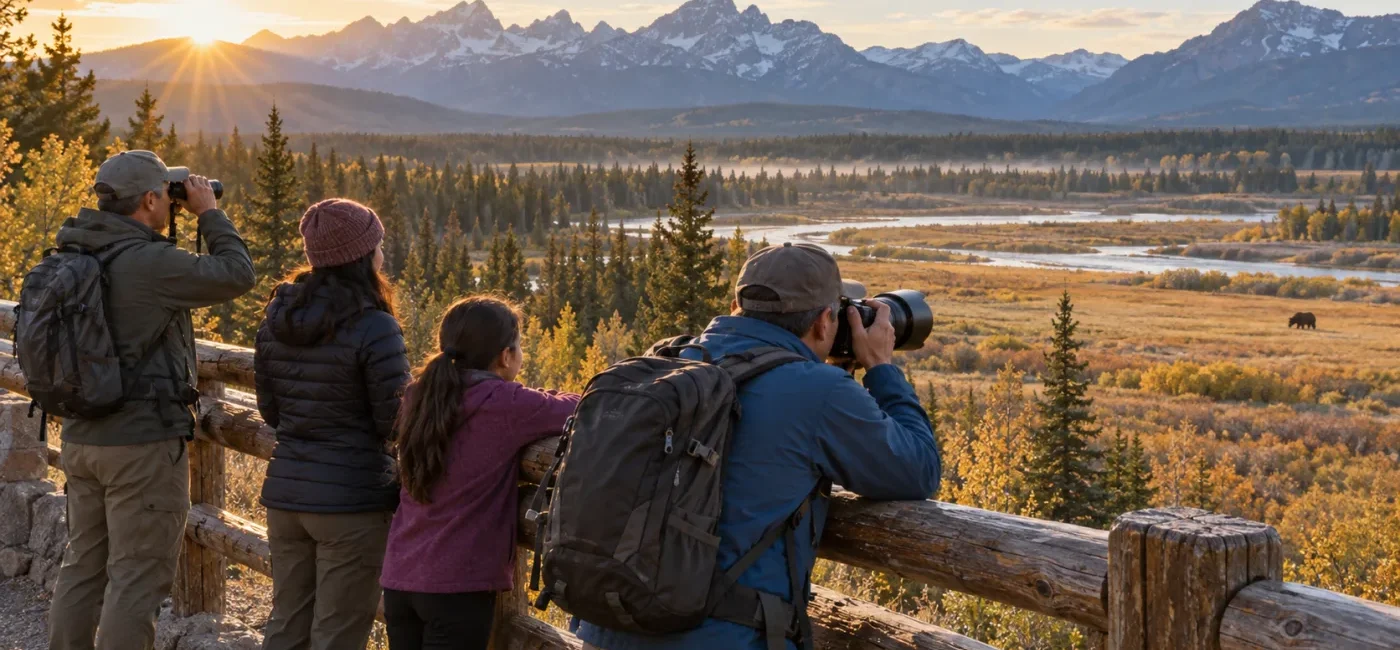
Seeing a bear, bison, elk, moose, or other wild animal in a national park can be the highlight of a trip. Before reaching for a camera, however, do four things: stop, check the animal’s route and your own escape path, create the distance required by that park, and use binoculars or zoom instead of moving closer. An animal that looks calm is not tame. If it raises its head, stops feeding, turns toward you, or changes direction because of your presence, you may already be too close.
The National Park Service (NPS) stresses that minimum viewing distances vary by park, terrain, and species. Many parks require at least 25 yards from most wildlife and 100 yards from predators such as bears and wolves, while some parks require more. Those numbers are not a universal permission line. The rules on the park’s official website, NPS app, entrance signs, temporary closures, and ranger instructions take priority.
This guide provides general U.S. travel and outdoor-safety information. It does not replace site-specific rules, closure orders, ranger instructions, or emergency guidance. Wildlife behavior and terrain are unpredictable. If a situation feels unsafe, give up the view and move to a secure location.
A common mistake is assuming every national park follows the same rules. Even for bears, viewing distances, bear-spray recommendations, food-storage requirements, and pet restrictions can change by park, season, activity area, and camping style. Cell service may be weak or unavailable, so save screenshots or offline notes covering the following:
Every traveler should understand the plan. If only the driver knows the rules, a passenger may open a door when an animal appears, or a child may step toward an overlook while holding a snack. Before anyone exits, repeat three simple rules: doors open only after the driver checks, food stays secured, and everyone backs away if wildlife approaches.
Keeping 100 yards from a bear in the first park does not mean every animal in the next park has the same rule. Yellowstone is a familiar example: it requires at least 100 yards from bears and wolves and at least 25 yards from other animals. Another park may use different species-based standards or greater distances. Recheck the official rules whenever you cross into a new park, and remember that a temporary closure or ranger direction at the scene may be newer than information you saved earlier.
A minimum distance is a floor, not a target. If an animal changes its behavior because of you, back away even if you believe you are outside the posted number. Ears pinned back, pawing the ground, abruptly raising the head, moving toward young, stopping feeding, facing people directly, or pacing can all signal that the animal needs more room.
When distance is hard to estimate, the “rule of thumb” can provide a conservative visual cue: fully extend one arm, close one eye, and see whether your thumb completely covers the animal. If it does not, move farther away. This does not replace a park’s legal distance requirement. Large animals and predators still require generous space even when you are using binoculars or a long lens.
When wildlife appears from a vehicle, traffic and pedestrians are the first hazards to manage. NPS guidance says to pull completely off the road into a designated pullout or safe location before watching. A sudden stop in a travel lane or a vehicle left partly on a narrow shoulder can cause a rear-end crash or force people into traffic.
Missing a photo is better than creating a collision. At night, slow down after seeing one animal because another member of the group may follow. Never accelerate around wildlife because traffic is building behind you. For broader road-trip preparation, see Smartor’s Fall Scenic Drive Safety Checklist.
A strong wildlife photo depends on steady distance and patient behavior, not proximity. Poor smartphone zoom quality is never a reason to reduce the safety margin. Use binoculars, an optical zoom lens, a compact tripod, or a stable railing where permitted.
An animal that appears small in the frame can be evidence that you photographed responsibly. You can crop an image later. You cannot undo a stressed animal, an unsafe crowd, or an injured visitor.
Not every bear situation calls for the same response. Watching a distant bear, surprising one on a trail, having a bear approach, and experiencing a defensive or predatory attack are different scenarios. NPS notes that recommendations can vary because local bear behavior and conditions vary. Check the visitor center or backcountry office for current instructions before hiking.
In a typical encounter where a bear has noticed you, speak calmly so it can identify you as human. Do not scream, make sudden movements, or run. Pick up small children immediately. Do not stand between a bear and its young or block its route. If the bear is stationary, move away slowly and sideways so you can watch it without tripping. Do not drop your pack to distract it or allow it to reach your food.
Bear spray is a defensive tool for stopping an aggressive, charging, or attacking bear. It is not a repellent to apply to a person, tent, or equipment. NPS recommends selecting an EPA-approved product specifically designed for bears and checking whether the park recommends or permits it for the planned activity. Follow local training, carry it where it can be reached immediately, and learn how wind direction and deployment affect its use before starting the trip.
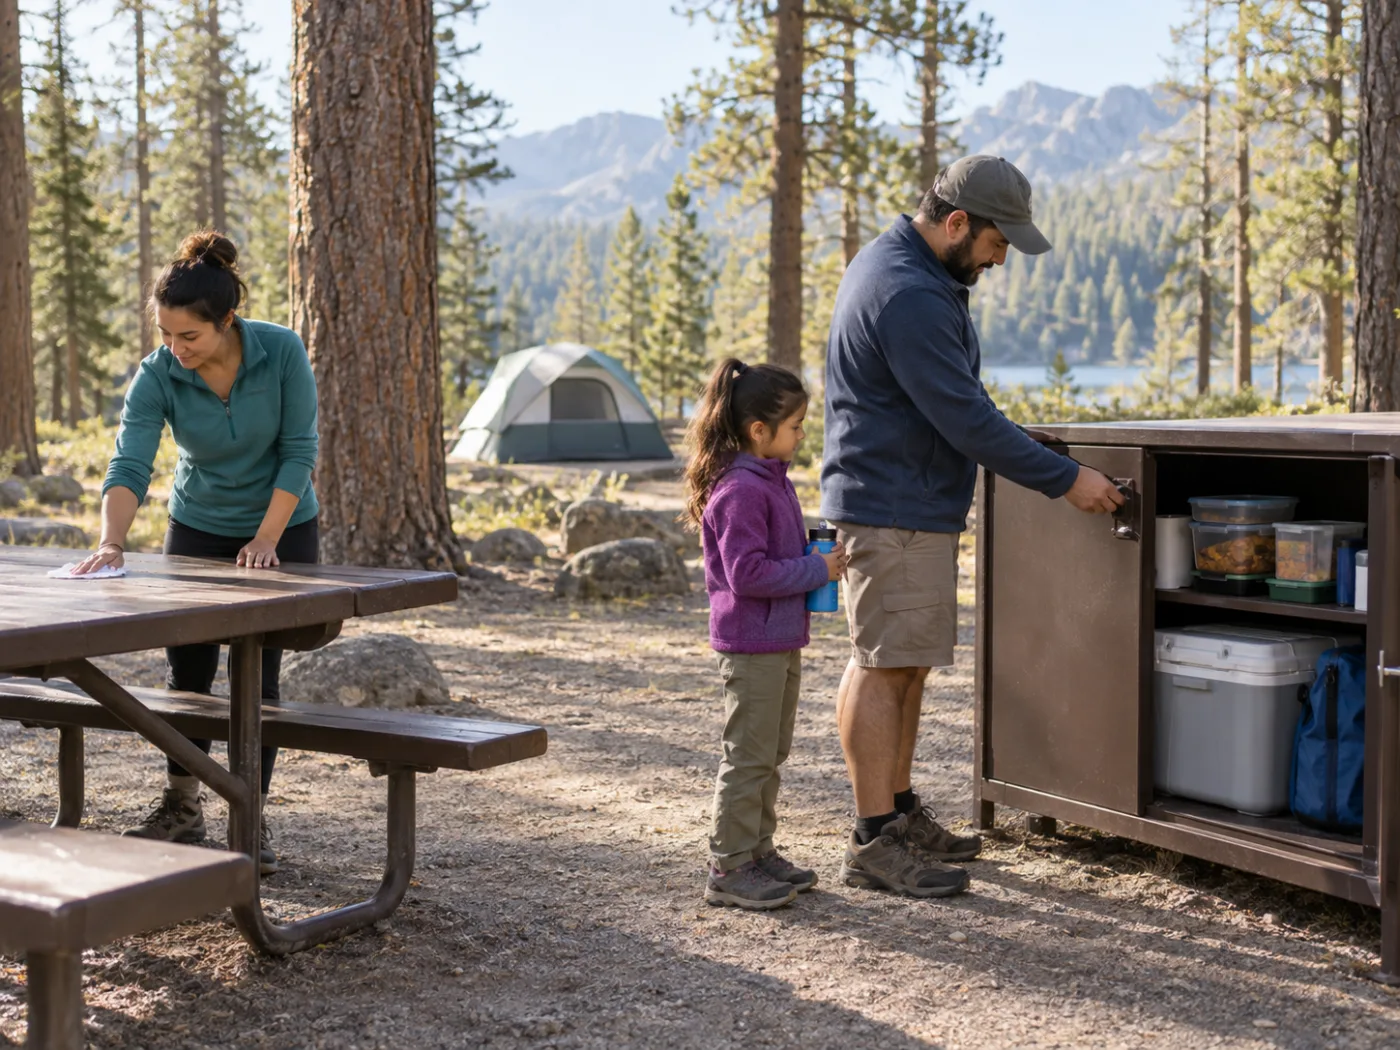
To a bear, “food” can include much more than sandwiches and trail mix. NPS guidance includes beverages, canned goods, soap, cosmetics, toiletries, garbage, coolers, sunscreen, insect repellent, fuel, and cooking or eating equipment among items that may smell like food. Empty wrappers and crumbs in a child’s car seat also matter.
Vehicle storage is not always allowed, and a rule that permits it during the day may prohibit it overnight. Other parks require visitors to remove all food from vehicles and use lockers. “It was allowed at the last park” is not a valid assumption. Confirm the current requirement with a ranger or campground host at check-in.
A family group cannot assume everyone will back away at the same speed. A child may run toward an animal, a dog may bark and pull, and an older adult may need more time on uneven ground. Assigning roles before viewing begins can prevent confusion during a surprise.
If an elk moves between parked cars while your family is returning to its vehicle, do not take the shortest line to the door. Maintain distance, move toward a building, ranger station, or other secure location, and give the elk time to pass. Do not position a child for a photo or squeeze alongside the animal while using a car as a shield. Bulls can be especially defensive during the rut, and cows can aggressively protect calves.
In dense vegetation, around blind curves, near loud streams, and beside berry patches, animals may detect people late. NPS recommends paying attention, traveling in groups, and calmly making human presence known in low-visibility bear habitat. Blocking both ears with headphones or silently hiking alone can make signs easier to miss.
Turning around because of wildlife is not a failed trip. Returning safely matters more than completing every item on an itinerary. For permits, timed entry, camping, and backup planning, use Smartor’s U.S. National Park Reservation Guide.
Notify a ranger if wildlife approaches people, appears sick or behaves strangely, lies injured on a road, or receives food from a visitor. Do not move closer or create a confrontation while trying to correct someone else. Describe the location with a trail name, mile marker, overlook, parking-area number, or another feature that responders can identify.
For an injury or immediate threat, call 911 or the emergency number provided by the park. If there is no signal, go to the nearest ranger station, visitor center, campground host, or emergency phone. A photo or video taken from a safe distance can support a report, but it should never delay getting help.
Many parks require at least 25 yards from most wildlife and 100 yards from predators such as bears and wolves, but these are not nationwide rules. A park may require more. If an animal reacts or approaches, increase the distance regardless of the number.
That depends on the site and the animal’s location, but you must not block the road, lean outside, or move a vehicle closer for a photo. Park completely in a designated pullout and maintain the required distance. Close windows and leave room if an animal approaches the vehicle.
No. Seeing a distant bear is not the same as being attacked, and responses differ by species and behavior. NPS gives different guidance for a defensive brown/grizzly bear attack and a black bear attack. Learn the park’s guidance in advance and maintain distance during an ordinary sighting.
No. Bear spray is a defensive tool, not a product to apply to people or equipment. Confirm whether it is allowed or recommended, and follow the product label plus park guidance.
No. Some parks allow vehicle storage only under specific conditions or at certain times, while others require lockers. Closed windows and hidden food may not satisfy local rules. Check the park’s current requirement.
Do not touch or feed the animal. A young animal that appears alone may have a parent nearby. Maintain distance and report the location and behavior to a ranger so trained staff can assess it.
브라우저 메뉴에서 앱 설치 또는 홈 화면에 추가를 선택해 주세요.
[…] Smartor 편집팀 September 21, 2026 Read this guide in English → […]