

Before turning up the heat for the first cold morning, take a careful look at where your home may be wasting energy. A useful home energy check is not a shopping trip or a promise that one upgrade will slash every bill. It is a method: establish a baseline from utility use, map uncomfortable rooms, inspect common air-leak and insulation locations, check heating and hot-water systems within safe limits, and rank the findings by safety, cost, and confidence.
This guide is designed for U.S. homeowners, condo residents, townhome owners, and renters who want a practical fall walkthrough. The goal is to leave with specific next actions—adjust the front-door latch, document a wet area before adding insulation, confirm the HVAC filter specification, or schedule a qualified whole-home assessment—instead of a vague conclusion that the house is “inefficient.”
This article provides general home-maintenance and energy-saving information, not engineering, electrical, tax, financial, or property-specific advice. Stop if you encounter electrical, gas, combustion, asbestos, mold, structural, or fall hazards. Do not enter an attic or crawlspace that lacks safe access. Renters should check their lease and obtain any required approval before altering windows, doors, equipment, or building materials.
What to gather before the walkthrough
Split the project into a 60- to 90-minute walkthrough and a separate half hour for organizing notes. Daylight is best for exterior and attic-entry observations; after dark, you may be able to spot light around doors. If you plan to use a ladder or inspect an attic opening, tell another person what you are doing and avoid working alone in an unsafe area.
- Twelve months of electric, natural-gas, propane, or heating-oil usage
- A phone camera and note app, or a printed checklist
- A flashlight, tape measure, painter’s tape, gloves, eye protection, and a dust mask
- The actual size and model requirements for your HVAC filter
- Room temperature and humidity readings, if you already have a monitor
- The home’s approximate age and dates of major roof, window, or HVAC work
Do not use a candle, lighter, or incense to hunt for drafts. Do not remove electrical-panel covers, dismantle outlets, touch exposed wiring, or put objects into a combustion vent. An infrared thermometer or thermal camera can help locate an area for further investigation, but the colors alone do not prove missing insulation or water damage. Sun exposure, wind, indoor-outdoor temperature difference, and surface materials all affect readings.
Step 1: Build a utility-use baseline
Start with consumption, not dollars. Rates, taxes, billing periods, and fuel prices can change even when a household uses the same amount of energy. Record electricity in kWh and natural gas in the unit shown on the bill, such as therms or CCF. For propane or heating oil, list delivery dates and quantities.
- Mark two low-heating months and two high-heating months from the past year.
- Note changes in household size, work-from-home days, travel, EV charging, appliances, or renovations.
- Compare the same month in the prior year only after considering weather and household changes.
- For a sudden spike, check the number of billing days and whether the reading was actual or estimated.
- Set a monthly reminder to record usage at the same point in each billing cycle.
Example: If August and September electricity use is nearly identical but the September total is much higher, investigate the rate and billing period first. If the dollar amount is steady but kWh keeps climbing, list new or longer-running loads such as a dehumidifier, second refrigerator, home office, or EV. That evidence is more useful than assuming all the windows need replacement.
ENERGY STAR’s Home Energy Yardstick can use basic home and energy information to provide a comparison with similar homes. Treat the result as a screening tool, not a diagnosis or a guarantee of savings. Renters with shared meters or utilities included in rent can ask management whether building- or unit-level usage records are available.
Step 2: Draw a comfort map
Sketch each floor and mark cold winter rooms, overheated summer rooms, recurring window condensation, musty odors, unusually cold floors, and places where dust or outdoor smells enter. Energy problems often show up as comfort, moisture, airflow, or noise issues before they are obvious on a bill.
- Can you see light along the sides or bottom of a closed exterior door?
- Are window-frame joints cracked, loose, or visibly separated?
- Do you feel cool air around plumbing openings under an exterior-wall sink?
- Are supply and return registers open and clear of furniture, rugs, and curtains?
- Are there dark dust lines, moisture, or staining around a register?
- Does closing an interior door dramatically change airflow or room temperature?
- Do ceilings or walls show stains, bubbling paint, or a persistent musty smell?
Resolve water entry and moisture causes before covering an area with more insulation. A roof or plumbing leak, weak bath exhaust, or foundation drainage problem can damage new materials and create an indoor-air problem. After rainfall, use Smartor’s fall home drainage checklist to trace how roof and surface water move away from the building.
Step 3: Check doors, windows, and penetrations for air leaks
Drafts do not always come through the glass. Common pathways include operable window joints, door bottoms, plumbing and cable penetrations, attic hatches, and gaps around a fireplace assembly. On a windy day, move the back of your hand near a suspected gap or safely hold a thin tissue nearby to compare airflow. Never use a flame. Number each location with painter’s tape and take a photo.
Doors and windows
- Confirm that an exterior-door latch pulls the door evenly against the seal.
- Look for crushed, missing, or torn weatherstripping and door sweeps.
- Lock each window and check whether the sash seats evenly in the frame.
- Before exterior caulking, verify the product’s surface, temperature, and moisture requirements.
- If condensation is trapped between glazing layers, surface caulk may not address a failed sealed unit.
Less obvious pathways
Look around pipes below sinks, bath-exhaust penetrations, cable entries, built-in cabinets, attic-access panels, and basement rim joists. Do not fill every opening with the same material. Chimneys, flues, recessed lights, and hot pipes may require specific clearances and fire-rated systems. Aggressive air sealing can also affect combustion air and drafting in a home with fuel-burning equipment, so pair major sealing work with qualified combustion-safety testing.
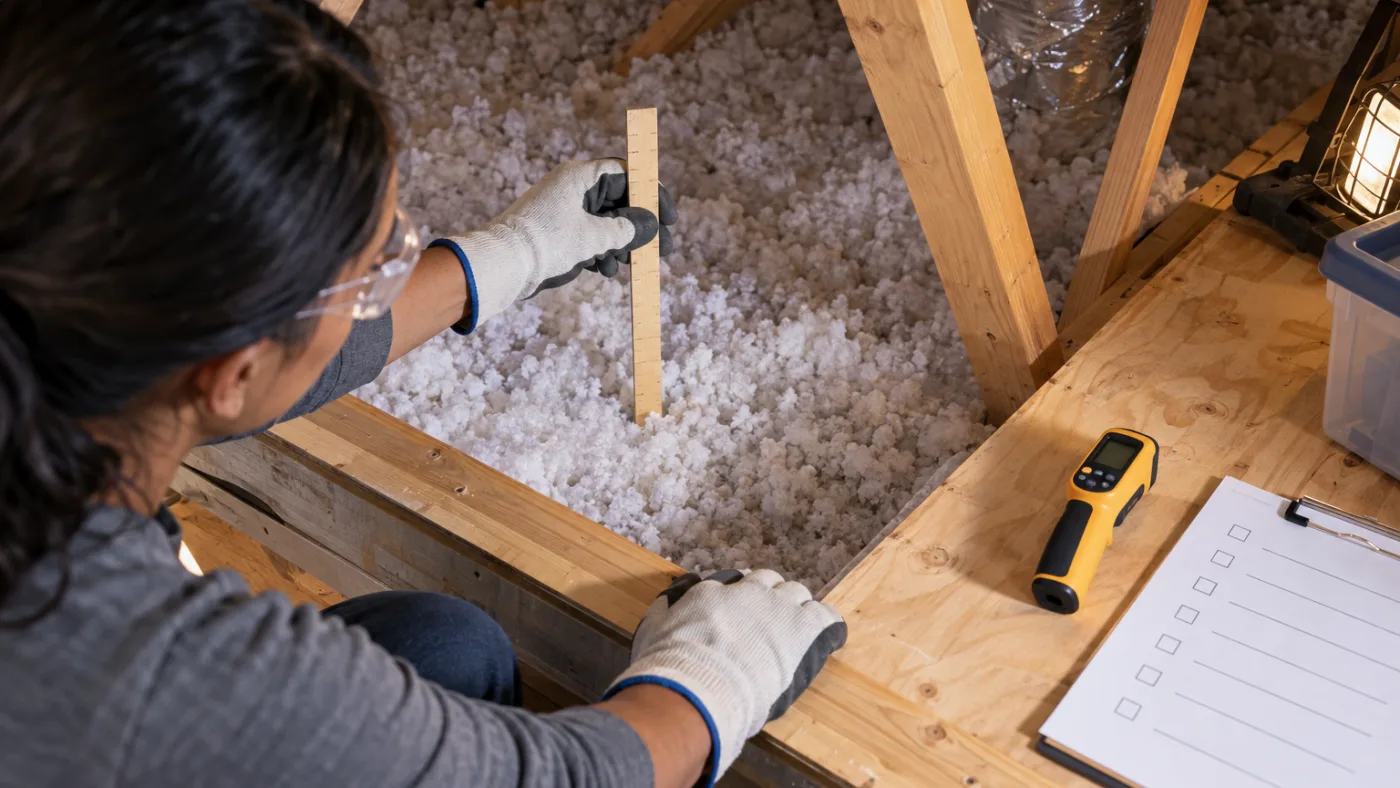
Step 4: Observe attic and insulation conditions safely
The attic can reveal major heat-flow and moisture clues, but it also presents fall, nail, weak-ceiling, exposed-wire, dust, and heat hazards. If there is no fixed walking surface or the access is unstable, stay at the opening and use a flashlight or camera. Do not disturb unidentified insulation, pipe wrap, or vermiculite-like material in an older home.
What to look for from the access point
- Does insulation cover the area evenly, or is it compressed, shifted, or missing?
- Are there droplets, stains, or damp marks on roof decking, nails, or framing?
- Do kitchen and bathroom exhaust ducts appear to terminate outdoors rather than in the attic?
- Does the attic hatch have insulation and an air seal around its perimeter?
- Do recessed lights and chimney areas appear to preserve required clearances?
- Are there pest signs, damaged wires, or a burning odor?
Appropriate insulation levels depend on climate zone, assembly, and existing materials. Thickness alone does not establish performance. Use ENERGY STAR guidance and product markings, and address moisture, wiring, and pest problems before air sealing or adding insulation. When requesting bids, ask for area, existing material, target performance, air-sealing scope, ventilation protection, access, and cleanup—not simply “add more attic insulation.”
Step 5: Check HVAC airflow, not just whether the system starts
Safe homeowner checks are generally limited to the filter, registers, thermostat, outdoor-unit surroundings, and visible warning signs. Fuel type and equipment design determine the correct service procedure. Do not open burners, gas valves, refrigerant circuits, or electrical compartments.
- Photograph the filter’s exact dimensions and airflow arrow before removing it.
- Follow the equipment and filter manufacturer’s inspection guidance; household conditions vary.
- Locate supply and return registers and clear furniture, curtains, rugs, and boxes.
- On visible duct sections, look for disconnections, crushing, condensation, or failed sealing material.
- Confirm the thermostat clock, heat mode, schedule, temperature, and battery condition.
- Clear leaves and obstructions around an outdoor heat-pump unit according to its manual.
- Stop and request service for burning odors, soot, repeated shutdowns, or abnormal noise.
Homes with fuel-burning equipment also need working carbon-monoxide alarms and safe exhaust. Use the fall heating startup checklist for a more detailed seasonal review. Pair it with a home fire escape plan so alarm placement and evacuation are covered as well as energy use.
Step 6: Review hot-water energy and leaks
Hot-water consumption reflects more than shower length. Leaks, long pipe runs, controls, and equipment condition all matter. If you see pooled water, rust, corrosion, soot, or hear abnormal sounds near a water heater, do not attempt a repair without the appropriate training. Keep stored items away from gas-fired equipment and never obstruct a vent.
- Check whether a hot-water faucet continues dripping after it is fully closed.
- Inspect showerheads, faucet bases, and toilets for visible or audible leaks.
- Record fixtures with a long hot-water wait for later plumbing evaluation.
- Review dishwasher and clothes-washer loading and energy-saving settings.
- Do not make a large water-temperature change without considering scald prevention, hygiene, and manufacturer instructions.
Step 7: Spend 15 minutes on plug loads and lighting
Instead of measuring every outlet, identify devices that run around the clock or intentionally make heat. Examples include an older second refrigerator, dehumidifier, aquarium equipment, set-top box, home-office setup, game console, server, and portable heater. If you use a plug-in meter or smart plug, confirm its electrical rating. Do not place space heaters or other high-load appliances on devices or power strips not specifically rated for them.
- Check whether lights and decorative lighting in unused spaces turn off reliably.
- Set computer and monitor sleep timers that match real work habits.
- Identify chargers and accessory power strips that remain energized unnecessarily.
- Clean the refrigerator door gasket and test its grip with a strip of paper at several points.
- Clean dehumidifier and air-cleaner filters and verify humidity targets and schedules.
- For replacement bulbs, confirm socket wattage limits and enclosed-fixture compatibility.
Rank findings by safety, cost, and certainty
A list organized in discovery order can spend money in the wrong place. Sort each item into one of four groups:
- Immediate safety response: Gas odor, burning odor, hot receptacles, soot, damaged wiring, major leakage, or a CO alarm requires stopping use and contacting 911, the utility, building management, or a qualified professional as appropriate.
- Low-cost, high-confidence action: Clear blocked registers, verify a filter, adjust a loose door latch, replace a clearly failed weatherstrip, or correct a thermostat schedule.
- Diagnose before purchasing: Attic insulation, duct sealing, window replacement, and major HVAC work deserve measurements, a written scope, and comparable bids.
- Monitor: Photograph uncertain conditions and record room temperature, humidity, and next month’s usage before drawing a conclusion.
Budget example: A cold bedroom does not automatically call for new windows. First check a blocked register, a window that is not fully latched, missing insulation over that room, and duct-balancing issues. A minor seal may solve one problem; wet or compressed insulation could point to a leak that must be repaired first.
Questions to ask before hiring a home energy professional
ENERGY STAR describes a professional Home Performance Assessment as a systematic whole-home approach to identifying opportunities. The phrase “energy audit” does not guarantee the same service everywhere, so define the scope before booking.
- Does the assessment include blower-door, infrared, duct-leakage, and combustion-safety testing?
- What training, certifications, licensing where required, and insurance does the assessor have?
- Does the same company sell the recommended work, and are diagnosis and sales proposals separated?
- Will the report include photos, measurements, health and safety findings, and prioritized actions?
- Does a utility or state program require approved contractors, equipment, or preauthorization?
- Must an inspection or application occur before work begins to qualify for an incentive?
- Does the project include post-work verification or testing?
Incentive eligibility, amounts, timelines, and technical requirements can change by location, income, home, technology, and tax year. Verify any contractor claim directly with the government agency or utility that operates the program before signing or paying. The U.S. Department of Energy’s Weatherization Assistance Program directs eligible households to state and local application channels, but local agencies determine the process, documentation, and wait times.
Nine common mistakes
- Comparing dollars only: Rate changes can hide or exaggerate changes in energy use.
- Replacing windows first: The real cause may be a door adjustment, attic gap, duct issue, or moisture problem.
- Sealing every gap indiscriminately: Combustion air, exhaust, drainage, and moisture control still matter.
- Using a flame to detect drafts: Curtains, dust, and finishes can ignite.
- Covering wet insulation: The leak and damaged material need attention first.
- Assuming a denser filter is always better: A filter outside equipment specifications can restrict airflow.
- Drawing conclusions from one bill: Weather, occupancy, billing days, and lifestyle changes affect use.
- Looking for incentives after construction: Some programs require preapproval, specific products, or approved installers.
- Skipping documentation: Without before-and-after photos and usage, performance and warranty questions are harder to resolve.
A weekend action checklist
Friday evening
- Download 12 months of energy use.
- Mark three uncomfortable or damp areas.
- Photograph the filter label and thermostat settings.
Saturday daylight
- Number and photograph door, window, and plumbing-penetration concerns.
- Observe insulation and moisture from the safe attic access point.
- Clear registers and manufacturer-specified space around outdoor equipment.
- List hot-water leaks and devices that operate continuously.
Sunday
- Sort findings into safety, DIY, professional estimate, and monitoring groups.
- Read product instructions before any small weatherization project.
- Request two or three bids using the same written scope if professional work is needed.
- Schedule the next bill review and a midwinter follow-up.
FAQ
Is a DIY energy check enough?
It is useful for identifying blocked registers, filter issues, visible gaps, and usage patterns. A professional assessment is more appropriate when rooms have large temperature differences, bills rise without explanation, moisture or combustion equipment is involved, access is unsafe, or you are considering expensive work.
Should I caulk a drafty window?
Not automatically. Caulk on an operable joint can prevent the window from opening. Depending on the source, the correct response may be latch adjustment, weatherstripping, or sealant at a fixed exterior joint. Preserve drainage openings and follow the window and sealant manufacturers’ instructions.
Do I need a thermal camera?
No. Usage records, photos, a flashlight, and basic temperature and humidity notes can reveal a great deal. Thermal images require the right indoor-outdoor temperature difference and careful interpretation, so use them as supporting evidence rather than as a stand-alone diagnosis.
Can renters use this checklist?
Yes. Renters can analyze bills, clear registers, verify filter responsibilities, document door and window conditions, and check thermostat settings. Review the lease before applying films, seals, or other materials, and report defects to the landlord or manager in a dated, retrievable message.
How often should an HVAC filter be changed?
There is no single interval for every home. Equipment and filter instructions, runtime, pets, renovation dust, and wildfire smoke all matter. Inspect it regularly and use only a type and resistance compatible with the system.
How do I know whether an improvement worked?
Compare pre- and post-work consumption under similar weather and occupancy, and track comfort, humidity, drafts, and equipment runtime. Separate billing days and rates from actual use. For major work, put post-installation testing and documentation into the contract.
Final takeaway
The best result of a fall home energy check is not a long shopping list. It is a one-page priority plan backed by photos and usage data. Separate urgent safety concerns, establish a baseline, record air, moisture, and airflow clues, then distinguish low-risk maintenance from work that requires testing and a qualified professional. Even if you do not complete every upgrade this season, you will have stronger evidence for comparing bids and understanding winter utility use.
[…] Smartor 편집팀 September 13, 2026 Read this guide in English → […]